在代码中符合人体工程学地描述布局
🏗 结构化布局 API
Mondrian.buildSubviews(on: view) {
  VStackBlock {

    titleLabel

    HStackBlock {
      cancelButton
      sendButton
    }
  }
  .padding(24)
}
💃 为了保留 AutoLayout 的灵活性,我们提供了经典的 API 风格
经典布局 API
sendButton.mondrian.layout
  .width(120)
  .top(.toSuperview)
  .trailing(.toSuperview)
  .leading(.to(cancelButton).trailing)
  .activate()

🤵🏻♂️💭 我们认为我们仍然没有涵盖所有使用场景。 请随时在 Issues 中提出您遇到的情况!

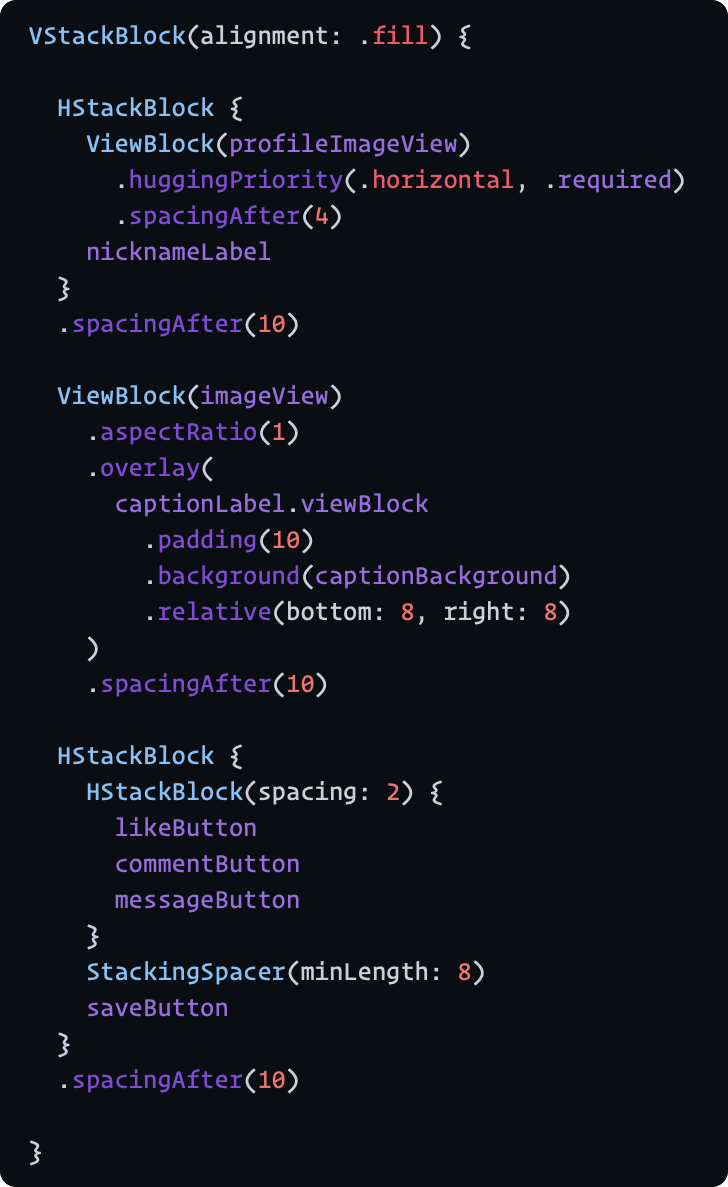
此图像由 MondrianLayout 布局
布局代码
HStackBlock(spacing: 2, alignment: .fill) {
  VStackBlock(spacing: 2, alignment: .fill) {
    UIView.mock(
      backgroundColor: .mondrianRed,
      preferredSize: .init(width: 28, height: 28)
    )

    UIView.mock(
      backgroundColor: .layeringColor,
      preferredSize: .init(width: 28, height: 50)
    )

    UIView.mock(
      backgroundColor: .mondrianYellow,
      preferredSize: .init(width: 28, height: 28)
    )

    UIView.mock(
      backgroundColor: .layeringColor,
      preferredSize: .init(width: 28, height: 28)
    )

    HStackBlock(alignment: .fill) {
      UIView.mock(
        backgroundColor: .layeringColor,
        preferredSize: .init(width: 28, height: 28)
      )
      UIView.mock(
        backgroundColor: .layeringColor,
        preferredSize: .init(width: 28, height: 28)
      )
    }
  }

  VStackBlock(spacing: 2, alignment: .fill) {
    HStackBlock(spacing: 2, alignment: .fill) {
      UIView.mock(
        backgroundColor: .layeringColor,
        preferredSize: .init(width: 28, height: 28)
      )
      VStackBlock(spacing: 2, alignment: .fill) {
        HStackBlock(spacing: 2, alignment: .fill) {
          UIView.mock(
            backgroundColor: .mondrianYellow,
            preferredSize: .init(width: 28, height: 28)
          )
          UIView.mock(
            backgroundColor: .layeringColor,
            preferredSize: .init(width: 28, height: 28)
          )
        }
        UIView.mock(
          backgroundColor: .layeringColor,
          preferredSize: .init(width: 28, height: 28)
        )
      }
    }

    HStackBlock(spacing: 2, alignment: .fill) {
      VStackBlock(spacing: 2, alignment: .fill) {
        UIView.mock(
          backgroundColor: .layeringColor,
          preferredSize: .init(width: 28, height: 28)
        )
        UIView.mock(
          backgroundColor: .mondrianBlue,
          preferredSize: .init(width: 28, height: 28)
        )
      }

      UIView.mock(
        backgroundColor: .layeringColor,
        preferredSize: .init(width: 28, height: 28)
      )

      VStackBlock(spacing: 2, alignment: .fill) {
        UIView.mock(
          backgroundColor: .layeringColor,
          preferredSize: .init(width: 28, height: 28)
        )
        UIView.mock(
          backgroundColor: .layeringColor,
          preferredSize: .init(width: 28, height: 28)
        )
      }
    }

    HStackBlock(spacing: 2, alignment: .fill) {
      UIView.mock(
        backgroundColor: .mondrianRed,
        preferredSize: .init(width: 28, height: 28)
      )
      VStackBlock(spacing: 2, alignment: .fill) {
        UIView.mock(
          backgroundColor: .layeringColor,
          preferredSize: .init(width: 28, height: 28)
        )
        UIView.mock(
          backgroundColor: .layeringColor,
          preferredSize: .init(width: 28, height: 28)
        )
      }
    }

  }

}
.overlay(
  UILabel.mockMultiline(text: "Mondrian Layout", textColor: .white)
    .viewBlock
    .padding(4)
    .background(
      UIView.mock(
        backgroundColor: .layeringColor
      )
      .viewBlock
    )
    .relative(bottom: 8, right: 8)
)
- 🌟 符合人体工程学地支持我们通过 DSL(如 SwiftUI 的布局)描述布局。
- 🌟 根据布局表示自动添加子视图。
- 🌟 支持与系统 AutoLayout API 集成。
- 🌟 提供经典的布局 API,用于描述每个视图的约束。
基于 DSL 的 AutoLayout 布局构建器
AutoLayout 在描述布局以及它如何根据边界框变化方面非常强大。
如果我们能获得更符合人体工程学的接口来声明约束会怎样。
 |
 |

- 优化代码 - 实现仍然冗长,因为我们不确定 API 是否可以稳定。
- 完善 DSL - 在描述中保持稳定。
- 添加更多修饰符以进行布局微调。
- 调整堆栈块的行为。
- 除了 DSL 之外,还添加了一种独立设置约束的方法
- AutoLayout 绝对是描述布局的强大工具。 我们可能需要额外设置约束,因为 DSL 无法描述布局的每种模式。
您可以从演示应用程序中看到许多布局示例。
Simulator.Screen.Recording.-.iPhone.8.-.2021-06-20.at.02.48.38.mp4
MondrianLayout 使我们能够通过 DSL(由 resultBuilders 提供支持)描述子视图的布局
它就像在 SwiftUI 中描述一样,但此行为略有不同,因为它是由 AutoLayout 系统布局的。
要描述布局,请使用 buildSubviews 作为入口点。
此方法创建一组 NSLayoutConstraint、UILayoutGuide 和 UIView 的修饰符。
最后,这些适用。 您不需要调用 addSubview。 这会根据布局描述的层次结构自动进行。
class MyView: UIView {

  let nameLabel: UILabel
  let detailLabel: UILabel

  init() {
    super.init(frame: .zero)

    // Seting up constraints constraints, layoutGuides and adding subviews
    Mondrian.buildSubviews(on: self) {
      VStackBlock {
        nameLabel
        detailLabel
      }
    }

    // Seting up constraints for the view itself.
    Mondrian.layout {
      self.mondrian.layout.width(200) // can be method cain.
    }

  }
}
示例代码假定在 UIView 中运行。(self 是 UIView)
您可以将其替换为 UIViewController.view。
附加到顶部和底部安全区域。
Mondrian.buildSubviews(on: self) {
  LayoutContainer(attachedSafeAreaEdges: .vertical) {
    VStackBlock {
      ...
    }
  }
}
或者
Mondrian.buildSubviews(on: self) {
  VStackBlock {
    ...
  }
  .container(respectingSafeAreaEdges: .vertical)
}
Mondrian.buildSubviews(on: self) {
  ZStackBlock {
    backgroundView.viewBlock.relative(0)
  }
}
同义词
ZStackBlock(alignment: .attach(.all)) {
  backgroundView
}
ZStackBlock {
  backgroundView.viewBlock.alignSelf(.attach(.all))
}
Mondrian.layout {
  self.mondrian.layout.width(...).height(...)
}
或者
self.mondrian.layout.width(...).height(...).activate()
relative(0) 填充到 ZStackBlock 的边缘。
Mondrian.buildSubviews(on: self) {
  ZStackBlock {
    profileImageView.viewBlock.relative(0)
    textOverlayView.viewBlock.relative(0)
  }
}
ZStackBlock {
  myLabel
    .relative(.all, .min(20))
}
ZStackBlock {
  ZStackBlock {
    myLabel
  }
  .padding(20) /// a minimum padding for the label in the container
}
对齐
| center(默认) | leading | trailing | fill |
|---|---|---|---|
 |
 |
 |
 |
| center(默认) | top | bottom | fill |
|---|---|---|---|
 |
 |
 |
 |
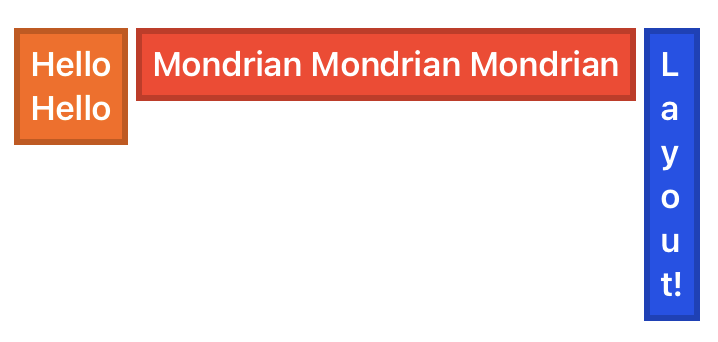
Mondrian.buildSubviews(on: self) {
  VStackBlock(spacing: 4, alignment: alignment) {
    UILabel.mockMultiline(text: "Hello", textColor: .white)
      .viewBlock
      .padding(8)
      .background(UIView.mock(backgroundColor: .mondrianYellow))
    UILabel.mockMultiline(text: "Mondrian", textColor: .white)
      .viewBlock
      .padding(8)
      .background(UIView.mock(backgroundColor: .mondrianRed))
    UILabel.mockMultiline(text: "Layout!", textColor: .white)
      .viewBlock
      .padding(8)
      .background(UIView.mock(backgroundColor: .mondrianBlue))
  }
}
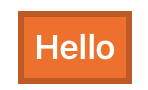
在堆叠布局块中添加一个空格。
label
  .viewBlock // To enable view describes layout
  .padding(8)
  .background(backgroundView)
label
  .viewBlock // To enable view describes layout
  .padding(8)
  .overlay(overlayView)
.relative 修饰符描述内容附加到带有填充的指定边缘。
未指定的边缘没有到边缘的约束。 因此,大小取决于固有内容大小。
您可以使用此修饰符将边缘固定为叠加内容。
ZStackBlock {
  VStackBlock {
    ...
  }
  .relative(bottom: 8, right: 8)
}
.padding 修饰符与 .relative 相似,但有所不同。
不同之处在于,未指定的边缘以 0 填充固定到边缘。
ZStackBlock {
  VStackBlock {
    ...
  }
  .padding(.horizontal, 10) // other edges work with 0 padding.
}
 |
 |
在 Z 轴上堆叠视图(在中心对齐)
ZStackBlock {
  view1
  view2
  view3
}
将每个视图扩展到指定的边缘
ZStackBlock(alignment: .attach(.all)) {
  view1
  view2
  view3
}
指定每个视图的对齐方式
ZStackBlock {

  view1.viewBlock.alignSelf(.attach(.all))

  view2.viewBlock.alignSelf(.attach([.top, .bottom]))

  view3.viewBlock.alignSelf(.attach(.top))
}
LayoutManager 支持它。
如果我们需要根据某些条件(例如取决于特征)更改布局,则此对象可以帮助实现。
// TODO: #19
结构化布局 API(DSL)不涵盖所有使用场景。
有时我们仍然需要一种描述复杂布局约束的方法。
MondrianLayout 也提供它,就像其他 AutoLayout 库一样。
独立激活约束
view.mondrian.layout
  .width(10)
  .top(.toSuperview)
  .right(.toSuperview)
  .leading(.toSuperview)
  .activate() // activate constraints and returns `ConstraintGroup`
批量布局**
// returns `ConstraintGroup`
Mondrian.layout {

  box1.mondrian.layout
    .top(.toSuperview)
    .left(.toSuperview)
    .right(.to(box2).left)
    .bottom(.toSuperview)

  box2.mondrian.layout
    .top(.toSuperview.top, .exact(10))
    .right(.toSuperview)
    .bottom(.toSuperview)
}
view.layout.horizontal(.toSuperview, .exact(10))
view.layout.vertical(.toSuperview, .exact(10))
view.layout.edge(.toSuperview)
view.layout.edge(.to(myLayoutGuide))
CocoaPods
pod "MondrianLayout"
SwiftPM
dependencies: [
    .package(url: "https://github.com/muukii/MondrianLayout.git", exact: "<VERSION>")
]
MondrianLayout 在 MIT 许可证下发布。