


![]()
![]()
![]()
如果您仅支持 iOS 15+/macOS 12+ 并且不关心动画图像格式,请尝试 SwiftUI 的 AsyncImage
SDWebImageSwiftUI 是一个基于 SDWebImage 的 SwiftUI 图像加载框架。
它带来了 SDWebImage 的所有您喜欢的功能,例如异步图像加载、内存/磁盘缓存、动画图像播放和性能。
该框架提供了不同的 View 结构体,其 API 符合 SwiftUI 框架指南。如果您熟悉 Image,您会发现 WebImage 和 AnimatedImage 很容易使用。
从 v3.0.0 版本开始,SDWebImageSwiftUI 可以为 visionOS 平台编译。但是,由于缺少包管理器支持(需要工具更新),我们尚不支持 CocoaPods/SPM。
您只能使用 Xcode 的内置包管理器依赖来在 visionOS 上构建。
要运行 visionOS 示例,您需要克隆并添加 SDWebImage 和 SDWebImageSwiftUI,打开 SDWebImageSwiftUI.xcworkspace 并将这些文件夹拖动成为本地包依赖,请参阅:Editing a package dependency as a local package
如果您真的想构建框架而不是使用 Xcode 的包依赖,请按照以下手动步骤操作
- 克隆 SDWebImage,打开
SDWebImage.xcodeproj并为 visionOS 平台构建SDWebImage目标(如果需要,将MACH_O_TYPE更改为静态库) - 克隆 SDWebImageSwiftUI,在
Carthage/Build/visionOS创建目录并将SDWebImage.framework复制到其中 - 打开
SDWebImageSwiftUI.xcodeproj并构建SDWebImageSwiftUI visionOS目标
由于 SDWebImageSwiftUI 构建于 SDWebImage 之上,它既提供了开箱即用的功能,也提供了您在真实世界应用程序中可能需要的高级强大功能。当您需要时,请查看我们的 Wiki
- 动画图像全栈解决方案,平衡 CPU 和 RAM
- 渐进式图像加载,支持动画
- 可重用下载,永远不会重复请求单个 URL
- URL 请求/响应修饰符,提供自定义 HTTP 标头
- 图像转换器,应用圆角或 CIFilter
- 多缓存系统,从不同来源查询
- 多加载器系统,从不同资源加载
您还可以从 SDWebImage 周围的现有社区获得所有好处。您可以通过 Coder Plugins 获得大量图像格式支持(GIF/APNG/WebP/HEIF/AVIF/SVG/PDF),通过 SDWebImagePhotosPlugin 获得 PhotoKit 支持,通过 FirebaseUI 获得 Firebase 集成等。
除了所有这些功能外,我们还为 SwiftUI 进行了优化,例如 Binding、View Modifier,使用相同的设计模式成为优秀的 SwiftUI 公民。
此框架正在大量开发中,建议尽可能使用最新版本(包括 SDWebImage 依赖项)。
此框架遵循 语义版本控制。每个源不兼容的 API 更改都将升级到主要版本。
本项目使用 keep a changelog 格式来记录更改。查看 CHANGELOG.md 了解版本之间的更改。更改也将在 Release 页面中更新。
欢迎所有问题报告、功能请求、贡献和 GitHub 星星。如果您觉得这个框架有用,希望得到积极的反馈和推广。
- Xcode 14+
- iOS 14+
- macOS 11+
- tvOS 14+
- watchOS 7+
- visionOS 1+
iOS 14(macOS 11) 引入了 SwiftUI 2.0,它保持了大多数 API 的兼容性,但更改了许多内部行为,这破坏了 SDWebImageSwiftUI 的功能。
从 v3.0.0 开始,SDWebImageSwiftUI 放弃了对 iOS 13 的支持。要在 iOS 13 上使用,请检出最新的 v2.x 版本(或使用 2.x 分支)。
由于 SDWebImage 6.0 将引入混合 Swift/Objc 代码库,此仓库将迁移到 SDWebImage Core Repo。
但不用担心,我们将使用自动跨模块覆盖,这意味着,您可以使用
import SwiftUI
import SDWebImage
像这样工作
import SwiftUI
import SDWebImage
import SDWebImageSwiftUI // <-- Automatic infer this
您将自动链接 SDWebImageSwiftUI,并且此库的命名仍将在 SPM 目标中保留。因此,对于你们大多数人来说,过渡是平滑的,我不想升级另一个主要版本。 3.x 是 SDWebImageSwiftUI 专用仓库的最终版本
注意:对于超级高级用户,如果您使用一些自定义 Swift 工具链,请务必传递 -Xfrontend -enable-cross-import-overlays
SDWebImageSwiftUI 可通过 Swift Package Manager 获得。
- 对于应用程序集成
对于应用程序集成,您应该使用 Xcode 12 或更高版本,将此包添加到您的应用程序目标。为此,请查看 Adding Package Dependencies to Your App,了解使用 Xcode 的分步教程。
- 对于下游框架
对于下游框架作者,您应该在您的 git 仓库中创建一个 Package.swift 文件,然后添加以下行来标记您的框架依赖于我们的 SDWebImageSwiftUI。
let package = Package(
    dependencies: [
        .package(url: "https://github.com/SDWebImage/SDWebImageSwiftUI.git", from: "3.0.0")
    ],
)
SDWebImageSwiftUI 可通过 CocoaPods 获得。要安装它,只需将以下行添加到您的 Podfile
pod 'SDWebImageSwiftUI'
SDWebImageSwiftUI 可通过 Carthage 获得。
github "SDWebImage/SDWebImageSwiftUI"
- 像 SDWebImage 一样支持占位符和详细选项控制图像加载
- 支持渐进式图像加载(如基线)
- 支持成功/失败/进度更改事件以进行自定义处理
- 支持带有活动/进度指示器和自定义的指示器
- 支持内置动画和过渡,由 SwiftUI 提供支持
- 也支持动画图像!
var body: some View {
    WebImage(url: URL(string: "https://nokiatech.github.io/heif/content/images/ski_jump_1440x960.heic")) { image in
        image.resizable() // Control layout like SwiftUI.AsyncImage, you must use this modifier or the view will use the image bitmap size
    } placeholder: {
            Rectangle().foregroundColor(.gray)
    }
    // Supports options and context, like `.delayPlaceholder` to show placeholder only when error
    .onSuccess { image, data, cacheType in
        // Success
        // Note: Data exist only when queried from disk cache or network. Use `.queryMemoryData` if you really need data
    }
    .indicator(.activity) // Activity Indicator
    .transition(.fade(duration: 0.5)) // Fade Transition with duration
    .scaledToFit()
    .frame(width: 300, height: 300, alignment: .center)
}
注意:此 WebImage 使用 Image 进行内部实现,这与 SwiftUI 布局和动画系统最兼容。但与 SwiftUI 的 Image 不同,后者不支持动画图像或矢量图像,WebImage 也支持动画图像(默认从 v2.0.0 开始)。
但是,WebImage 动画提供简单的常见用例,因此仍然建议使用 AnimatedImage 进行高级控制,例如渐进式动画渲染或矢量图像渲染。
@State var isAnimating: Bool = true
var body: some View {
    WebImage(url: URL(string: "https://raw.githubusercontent.com/liyong03/YLGIFImage/master/YLGIFImageDemo/YLGIFImageDemo/joy.gif"), isAnimating: $isAnimating)) // Animation Control, supports dynamic changes
    // The initial value of binding should be true
    .customLoopCount(1) // Custom loop count
    .playbackRate(2.0) // Playback speed rate
    .playbackMode(.bounce) // Playback normally to the end, then reversely back to the start
    // `WebImage` supports advanced control just like `AnimatedImage`, but without the progressive animation support
}
注意:对于指示器,您也可以自定义自己的指示器。例如,iOS 14/watchOS 7 引入了新的 ProgressView,可以轻松地通过以下方式使用
WebImage(url: url)
.indicator(.activity)
或者您可以像这样编写
WebImage(url: url)
.indicator {
    Indicator { _, _ in
        ProgressView()
    }
}
- 支持网络图像以及本地数据和捆绑图像
- 支持动画图像格式以及矢量图像格式
- 支持动画渐进式图像加载(如网络浏览器)
- 支持使用 SwiftUI Binding 进行动画控制
- 支持指示器和过渡,由 SDWebImage 和 Core Animation 提供支持
- 支持高级控制,如循环计数、播放速率、缓冲区大小、runloop 模式等
- 支持与原生 UIKit/AppKit 视图协调
var body: some View {
    Group {
        AnimatedImage(url: URL(string: "https://raw.githubusercontent.com/liyong03/YLGIFImage/master/YLGIFImageDemo/YLGIFImageDemo/joy.gif"), placeholderImage: .init(systemName: "photo")) // Placeholder Image
        // Supports options and context, like `.progressiveLoad` for progressive animation loading
        .onFailure { error in
            // Error
        }
        .resizable() // Resizable like SwiftUI.Image, you must use this modifier or the view will use the image bitmap size
        .indicator(.activity) // Activity Indicator
        .transition(.fade) // Fade Transition
        .scaledToFit() // Attention to call it on AnimatedImage, but not `some View` after View Modifier (Swift Protocol Extension method is static dispatched)

        // Supports SwiftUI ViewBuilder placeholder as well
        AnimatedImage(url: url) {
            Circle().foregroundColor(.gray)
        }

        // Data
        AnimatedImage(data: try! Data(contentsOf: URL(fileURLWithPath: "/tmp/foo.webp")))
        .customLoopCount(1) // Custom loop count
        .playbackRate(2.0) // Playback speed rate

        // Bundle (not Asset Catalog)
        AnimatedImage(name: "animation1.gif", isAnimating: $isAnimating) // Animation control binding
        .maxBufferSize(.max)
        .onViewUpdate { view, context in // Advanced native view coordinate
            // AppKit tooltip for mouse hover
            view.toolTip = "Mouseover Tip"
            // UIKit advanced content mode
            view.contentMode = .topLeft
            // Coordinator, used for Cocoa Binding or Delegate method
            let coordinator = context.coordinator
        }
    }
}
注意:AnimatedImage 支持动画图像格式的图像 url 或图像数据。它使用 SDWebImage 的 Animated ImageView 进行内部实现。请注意,由于这基于 UIKit/AppKit representable,因此某些高级 SwiftUI 布局和动画系统可能无法按预期工作。您可能需要 UIKit/AppKit 和 Core Animation 来修改原生视图。
注意:AnimatedImage 的某些方法(如 .transition、.indicator 和 .aspectRatio)与 SwiftUI.View 协议方法具有相同的命名。但是参数接收不同的类型。这是因为 AnimatedImage 支持与 UIKit/AppKit 组件和动画一起使用。如果您发现歧义,请使用完整的类型声明而不是点表达式语法。
注意:AnimatedImage 上的某些方法将返回 some View,一个新的 Modified Content。您将失去类型相关的修饰符方法。对于这种情况,您可以重新排序方法调用,或者在 .onViewUpdate 中使用原生视图(实际上是 SDAnimatedImageView),使用 UIKIt/AppKit API 进行补救。
// Using UIKit components
var body: some View {
    AnimatedImage(name: "animation2.gif")
    .indicator(SDWebImageProgressIndicator.default) // UIKit indicator component
    .transition(SDWebImageTransition.flipFromLeft) // UIKit animation transition
}

// Using SwiftUI components
var body: some View {
    AnimatedImage(name: "animation2.gif")
    .indicator(Indicator.progress) // SwiftUI indicator component
    .transition(AnyTransition.flipFromLeft) // SwiftUI animation transition
}
我们在这里有两种不同的 View 类型,是因为当前 SwiftUI 的限制。但我们的目标是为所有用例提供最佳解决方案。
如果您不需要动画图像,请首先首选使用 WebImage。它的行为与内置 SwiftUI View 无缝衔接。如果 SwiftUI 可以工作,它就可以工作。如果 SwiftUI 不能工作,它也不能工作 :)
如果您需要简单的动画图像,请使用 WebImage。它提供基本的动画图像支持。但它不支持渐进式动画渲染,也不支持矢量图像,如果您不关心这一点。
如果您需要强大的动画图像,AnimatedImage 是您的选择。请记住,它也支持静态图像,您无需检查格式,只需按原样使用即可。此外,一些强大的功能,如 UIKit/AppKit 颜色,矢量图像,符号图像配置,tvOS 分层图像,仅在 AnimatedImage 中可用,但目前在 SwiftUI 中不可用。
但是,由于 AnimatedImage 使用 UIViewRepresentable 并由 UIKit 驱动,因此目前 UIKit 和 SwiftUI 布局和动画系统之间可能存在一些小的兼容性问题,或者与 SwiftUI 本身相关的错误。我们尽力匹配 SwiftUI 行为,并提供与 WebImage 相同的 API,这使得在需要时可以轻松地在这两种类型之间切换。
ImageManager 是一个符合 Combine 的 ObservableObject 协议的类。它是我们提供的 WebImage 的核心获取数据源。
对于高级用例,例如将图像加载到您不想使用 WebImage 的复杂 View 图中。您可以直接将您自己的 View 类型与 Manager 绑定。
它看起来与 SDWebImageManager 类似,但它是为 SwiftUI 世界构建的,它为加载图像提供了真理之源。您最好使用 SwiftUI 的 @ObservedObject 为您的 View 实例绑定每个单独的 manager 实例,当图像状态更改时,它会自动更新您的 View 的 body。
struct MyView : View {
    @ObservedObject var imageManager = ImageManager()
    var body: some View {
        // Your custom complicated view graph
        Group {
            if imageManager.image != nil {
                Image(uiImage: imageManager.image!)
            } else {
                Rectangle().fill(Color.gray)
            }
        }
        // Trigger image loading when appear
        .onAppear { self.imageManager.load(url: url) }
        // Cancel image loading when disappear
        .onDisappear { self.imageManager.cancel() }
    }
}
此框架基于 SDWebImage,它支持高级自定义和配置,以满足不同用户的需求。
您可以为外部图像格式注册多个编码器插件。您可以注册多个缓存(不同的路径和配置)、多个加载器(URLSession 和 Photos URLs)。您可以控制缓存过期日期、大小、下载优先级等。所有这些都在我们的 wiki 中。
对于 SwiftUI App,放置这些设置代码的最佳位置是 AppDelegate.swift
func application(_ application: UIApplication, didFinishLaunchingWithOptions launchOptions: [UIApplication.LaunchOptionsKey: Any]?) -> Bool {
    // Add WebP/SVG/PDF support
    SDImageCodersManager.shared.addCoder(SDImageWebPCoder.shared)
    SDImageCodersManager.shared.addCoder(SDImageAVIFCoder.shared)
    SDImageCodersManager.shared.addCoder(SDImageSVGCoder.shared)
    SDImageCodersManager.shared.addCoder(SDImagePDFCoder.shared)

    // Add default HTTP header
    SDWebImageDownloader.shared.setValue("image/webp,image/apng,image/*,*/*;q=0.8", forHTTPHeaderField: "Accept")

    // Add multiple caches
    let cache = SDImageCache(namespace: "tiny")
    cache.config.maxMemoryCost = 100 * 1024 * 1024 // 100MB memory
    cache.config.maxDiskSize = 50 * 1024 * 1024 // 50MB disk
    SDImageCachesManager.shared.addCache(cache)
    SDWebImageManager.defaultImageCache = SDImageCachesManager.shared

    // Add multiple loaders with Photos Asset support
    SDImageLoadersManager.shared.addLoader(SDImagePhotosLoader.shared)
    SDWebImageManager.defaultImageLoader = SDImageLoadersManager.shared
    return true
}
有关更多信息,强烈建议您查看我们的演示,以了解详细的 API 用法。您还可以查看最新的 API 文档,以了解高级用法。
当在 List/LazyStack/LazyGrid 中使用有状态视图时,SwiftUI 有一个已知的行为(错误?)。只有顶层视图可以持有自己的 @State/@StateObject,但当子结构滚动出屏幕时,状态将丢失。但是,WebImage/Animated 都是有状态的。为了确保状态保持同步,即使在滚动出屏幕时也是如此。您可以使用一些技巧。
查看更多:https://twitter.com/fatbobman/status/1572507700436807683?s=21&t=z4FkAWTMvjsgL-wKdJGreQ
简而言之,不建议这样做
struct ContentView {
    @State var imageURLs: [String]
    var body: some View {
        List {
            ForEach(imageURLs, id: \.self) { url in
                VStack {
                    WebImage(url) // The top level is `VStack`
                }
            }
        }
    }
}
而是使用这种方法
struct ContentView {
    struct BodyView {
        @State var url: String
        var body: some View {
            VStack {
                WebImage(url)
            }
        }
    }
    @State var imageURLs: [String]
    var body: some View {
        List {
            ForEach(imageURLs, id: \.self) { url in
                BodyView(url: url)
            }
        }
    }
}
SwiftUI 的 Button 默认将其内容(Text 除外)应用覆盖层,这是编写如下代码的常见错误,这会导致奇怪的行为
// Wrong
Button(action: {
    // Clicked
}) {
    WebImage(url: url)
}
// NavigationLink create Button implicitly
NavigationView {
    NavigationLink(destination: Text("Detail view here")) {
        WebImage(url: url)
    }
}
相反,您必须覆盖 .buttonStyle 以使用 plain 样式,或 .renderingMode 以使用 original 模式。您也可以使用 .onTapGesture 修饰符进行触摸处理。请参阅 How to disable the overlay color for images inside Button and NavigationLink
// Correct
Button(action: {
    // Clicked
}) {
    WebImage(url: url)
}
.buttonStyle(PlainButtonStyle())
// Or
NavigationView {
    NavigationLink(destination: Text("Detail view here")) {
        WebImage(url: url)
        .renderingMode(.original)
    }
}
WebImage/AnimatedImage 都支持通过使用 SVG/PDF 外部编码器来渲染矢量图像。但是它们在内部是不同的。
AnimatedImage:使用来自 Apple 的符号图像和矢量绘图技术,支持动态尺寸更改而不会丢失细节。它使用基于 UIKit/AppKit 的实现和 API。如果您愿意,请传递.context(.imageThumbnailPixelSize: size)以使用位图渲染并获得更多像素。WebImage:将矢量图像绘制到位图版本中。就像普通的 PNG 一样。默认情况下,我们使用矢量图像内容大小(SVG 画布大小或 PDF 媒体框大小)。如果您愿意,请传递.context(.imageThumbnailPixelSize: size)以获得更多像素。
对于位图渲染,您还可以使用自定义颜色(如符号图像)为 SVG/PDF 图标着色,使用 .renderingMode(.template) 和 .tint(:) 或 .foregroundColor(:) 修饰符,这与 SwiftUI.Image 行为匹配。
- WebImage
var body: some View {
    WebImage(url: URL(string: "https://dev.w3.org/SVG/tools/svgweb/samples/svg-files/w3c.svg"))
    .resizable()
    .renderingMode(.template)
    .foregroundColor(.red) // or `.tint(:)`, `.accentColor(:)`
    .scaledToFit()
}
- AnimatedImage
var body: some View {
    AnimatedImage(url: URL(string: "https://dev.w3.org/SVG/tools/svgweb/samples/svg-files/w3c.svg"), context: [.imageThumbnailPixelSize : CGSize(width: 100, height: 100)])
    .resizable()
    .renderingMode(.template)
    // seems `.foregroundColor(:)` does effect `UIView.tintColor`, use `tint(:)` or `.accentColor(:)` instead.
    // Or you can use `onViewCreate(:)` to get native `SDAnimatedImageView` and set `tintColor` (AppKit use `contentTintColor`)
    .tint(.red)
    .scaledToFit()
}
查看更多:Configuring and displaying symbol images in your UI
SDWebImage 本身支持许多自定义加载器(如 Firebase Storage 和 PhotosKit)、缓存(如 YYCache 和 PINCache)和编码器(如 WebP 和 AVIF,甚至 Lottie)。
这是在 SwiftUI 环境中设置这些外部组件的教程。
您可以将设置代码放在 SwiftUI App.init() 方法中。
@main
struct MyApp: App {

    init() {
        // Custom Firebase Storage Loader
        FirebaseApp.configure()
        SDImageLoadersManager.shared.loaders = [FirebaseUI.StorageImageLoader.shared]
        SDWebImageManager.defaultImageLoader = SDImageLoadersManager.shared
        // WebP support
        SDImageCodersManager.shared.addCoder(SDImageWebPCoder.shared)
        // AVIF support
        SDImageCodersManager.shared.addCoder(SDImageAVIFCoder.shared)
    }

    var body: some Scene {
        WindowGroup {
            ContentView()
        }
    }
}
或者,如果您的 App 有复杂的 AppDelegate 类,请将设置代码放在那里
class AppDelegate: NSObject, UIApplicationDelegate {
    func application(_ application: UIApplication, didFinishLaunchingWithOptions launchOptions: [UIApplication.LaunchOptionsKey : Any]? = nil) -> Bool {
        SDImageCachesManager.shared.caches = [YYCache(name: "default")]
        SDWebImageManager.defaultImageCache = SDImageCachesManager.shared
        return true
    }
}

@main
struct MyApp: App {
    @UIApplicationDelegateAdaptor(AppDelegate.self) var appDelegate

    var body: some Scene {
        WindowGroup {
            ContentView()
        }
    }
}
对于某些自定义加载器,您需要使用一些特殊的 API 创建 URL 结构体,以便 SDWebImage 可以从其他 SDK 中检索上下文,例如
- FirebaseStorage
let storageRef: StorageReference
let storageURL = NSURL.sd_URL(with: storageRef) as URL?
// Or via convenience extension
let storageURL = storageRef.sd_URLRepresentation
- PhotosKit
let asset: PHAsset
let photosURL = NSURL.sd_URL(with: asset) as URL?
// Or via convenience extension
let photosURL = asset.sd_URLRepresentation
对于某些自定义编码器,您需要使用一些选项请求图像以控制行为,例如矢量图像 SVG/PDF。因为 SwiftUI.Image 或 WebImage 根本不支持矢量图形。
- SVG/PDF 编码器
let vectorURL: URL? // URL to SVG or PDF
WebImage(url: vectorURL, context: [.imageThumbnailPixelSize: CGSize(width: 100, height: 100)])
- Lottie 编码器
let lottieURL: URL? // URL to Lottie.json
WebImage(url: lottieURL, isAnimating: $isAnimating)
对于缓存,您实际上无需担心任何事情。设置后即可正常工作。
当您的应用程序目标具有低于 iOS 14/macOS 11/tvOS 14/watchOS 7 的部署目标版本时,SDWebImageSwiftUI 支持使用。这将弱链接 SwiftUI(Combine) 以允许在运行时使用可用性检查编写代码。
要使用向后部署,您必须执行以下操作
在您的应用程序目标的 Other Linker Flags 构建设置中添加 -weak_framework SwiftUI -weak_framework Combine。您也可以使用 Xcode 的 Optional Framework 复选框执行此操作,效果相同。
您应该注意到,所有第三方 SwiftUI 框架也应该具有此构建设置,而不仅仅是 SDWebImageSwiftUI。否则,在 iOS 12 设备上运行时,它将在启动时触发运行时 dyld 错误。
对于低于 iOS 12.2(第一个版本 Swift 5 Runtime 捆绑在 iOS 系统中)的部署目标版本,您必须更改 SDWebImageSwiftUI 的最低部署目标版本。这可能会对编译器的优化产生一些副作用,并为某些框架触发大量警告。
但是,对于 iOS 12.2+,您仍然可以将最低部署目标版本保持为 iOS 14,对于 iOS 14 客户端,没有额外的警告或性能下降。
因为 Swift 使用最低部署目标版本来检测是否链接应用程序捆绑的 Swift 运行时或系统内置的运行时 (/usr/lib/swift/libswiftCore.dylib)。
- 对于 CocoaPods 用户,您可以通过 post installer 在 Podfile 中更改最低部署目标版本
post_install do |installer|
  installer.pods_project.targets.each do |target|
    target.build_configurations.each do |config|
      config.build_settings['IPHONEOS_DEPLOYMENT_TARGET'] = '11.0' # version you need
    end
  end
end
-
对于 Carthage 用户,您可以使用
carthage update --no-build下载依赖项,然后更改 Xcode 项目的部署目标版本并构建二进制框架。 -
对于 SwiftPM 用户,您必须使用本地依赖项(使用 Git 子模块)来更改部署目标版本。
-
对于 Carthage 用户,构建的二进制框架将使用 Library Evolution 来支持向后部署。
-
对于 CocoaPods 用户,您可以在 Podfile 中跳过平台版本验证
platform :ios, '14.0' # This does not effect your App Target's deployment target version, just a hint for CocoaPods
- 对于 SwiftPM 用户,SwiftPM 不支持弱链接也不支持 Library Evolution,因此如果不更改最低部署目标,则无法部署到 iOS 12+ 用户。
使用可用性注释和运行时检查添加所有 SwiftUI 代码,如下所示
// AppDelegate.swift
func application(_ application: UIApplication, didFinishLaunchingWithOptions launchOptions: [UIApplication.LaunchOptionsKey: Any]?) -> Bool {
    // ...
    if #available(iOS 14, *) {
        window.rootViewController = UIHostingController(rootView: ContentView())
    } else {
        window.rootViewController = ViewController()
    }
    // ...
}

// ViewController.swift
class ViewController: UIViewController {
    var label: UILabel = UILabel()
    override func viewDidLoad() {
        super.viewDidLoad()
        view.backgroundColor = .white
        view.addSubview(label)
        label.text = "Hello World iOS 12!"
        label.sizeToFit()
        label.center = view.center
    }
}

// ContentView.swift
@available(iOS 14.0, macOS 11.0, tvOS 14.0, watchOS 7.0, *)
struct ContentView : View {
    var body: some View {
        Group {
            Text("Hello World iOS 14!")
            WebImage(url: URL(string: "https://i.loli.net/2019/09/24/rX2RkVWeGKIuJvc.jpg"))
        }
    }
}
要使用 SwiftUI 运行示例,请按照以下步骤操作
- 打开
SDWebImageSwiftUI.xcworkspace,等待 SwiftPM 完成下载测试依赖项。 - 选择
SDWebImageSwiftUIDemo(或其他平台)方案并运行演示应用程序。
注意:这里的 Podfile 是因为历史原因我们使用 CocoaPods 将库集成到 Demo 中,但现在我们使用 SPM。
由于 SwiftUI 旨在支持所有 Apple 平台,我们的演示也这样做,一个代码库包括
- iOS (iPhone/iPad/Mac Catalyst)
- macOS
- tvOS
- watchOS
- visionOS
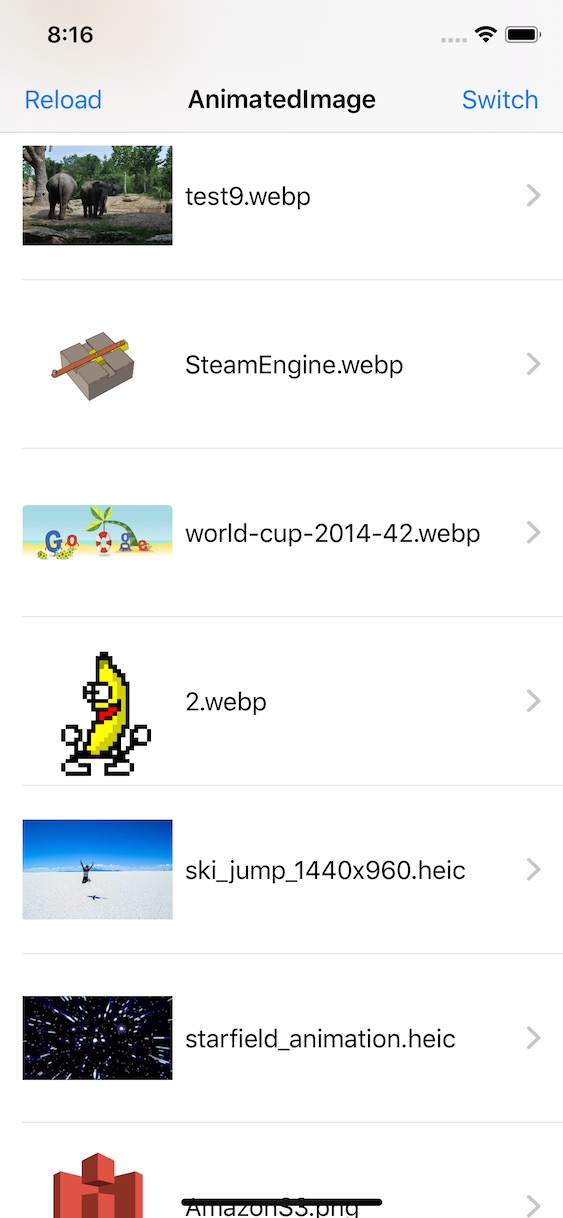
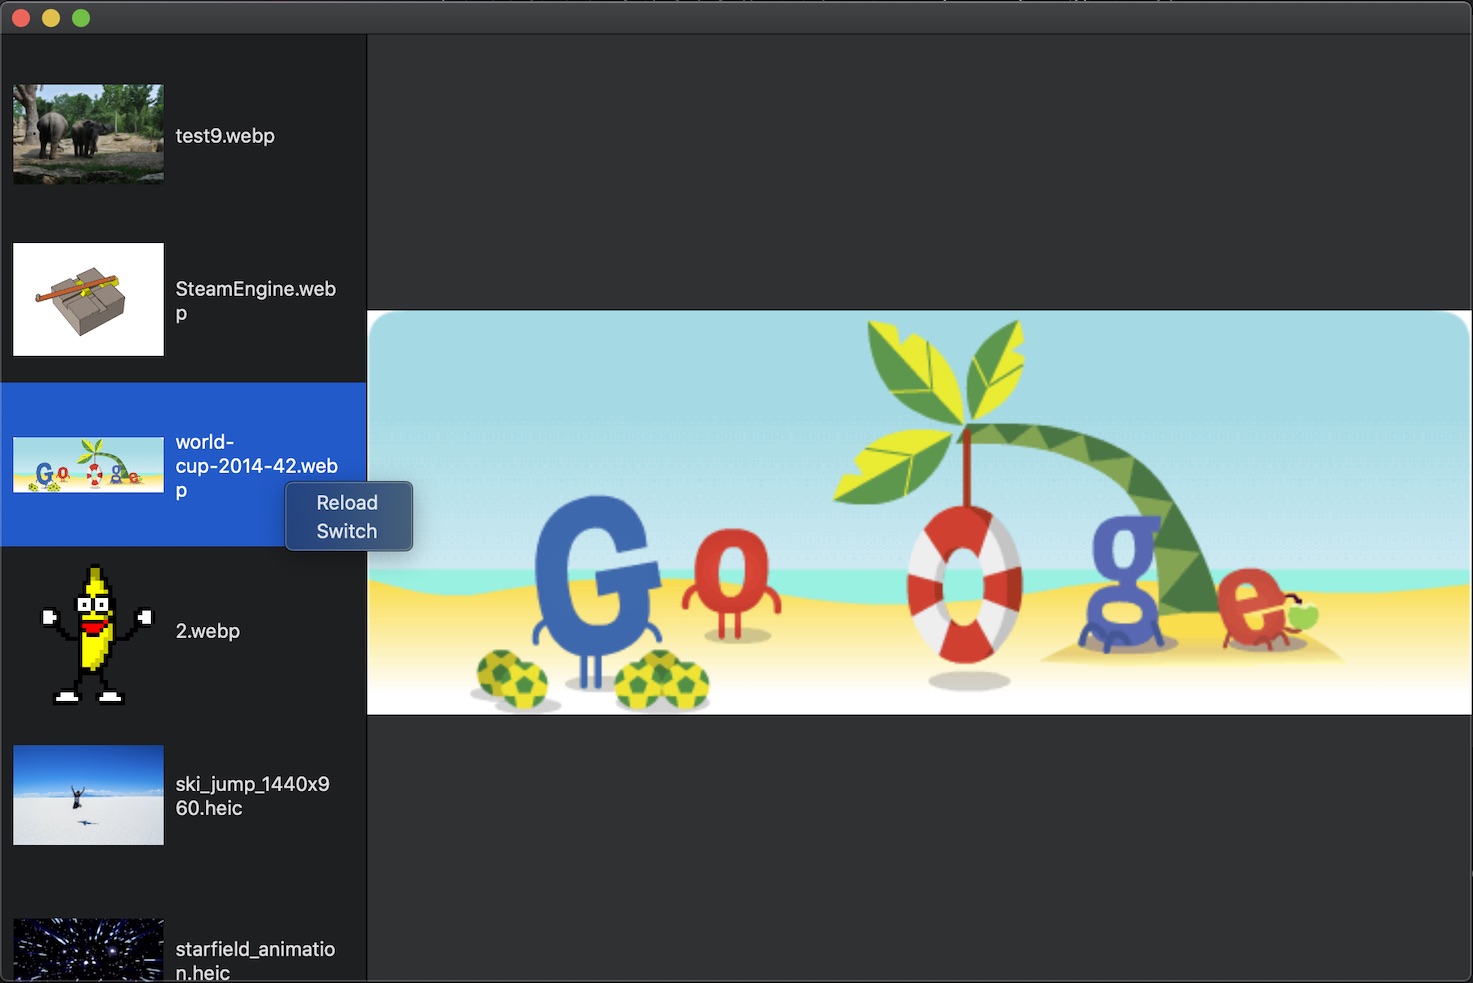
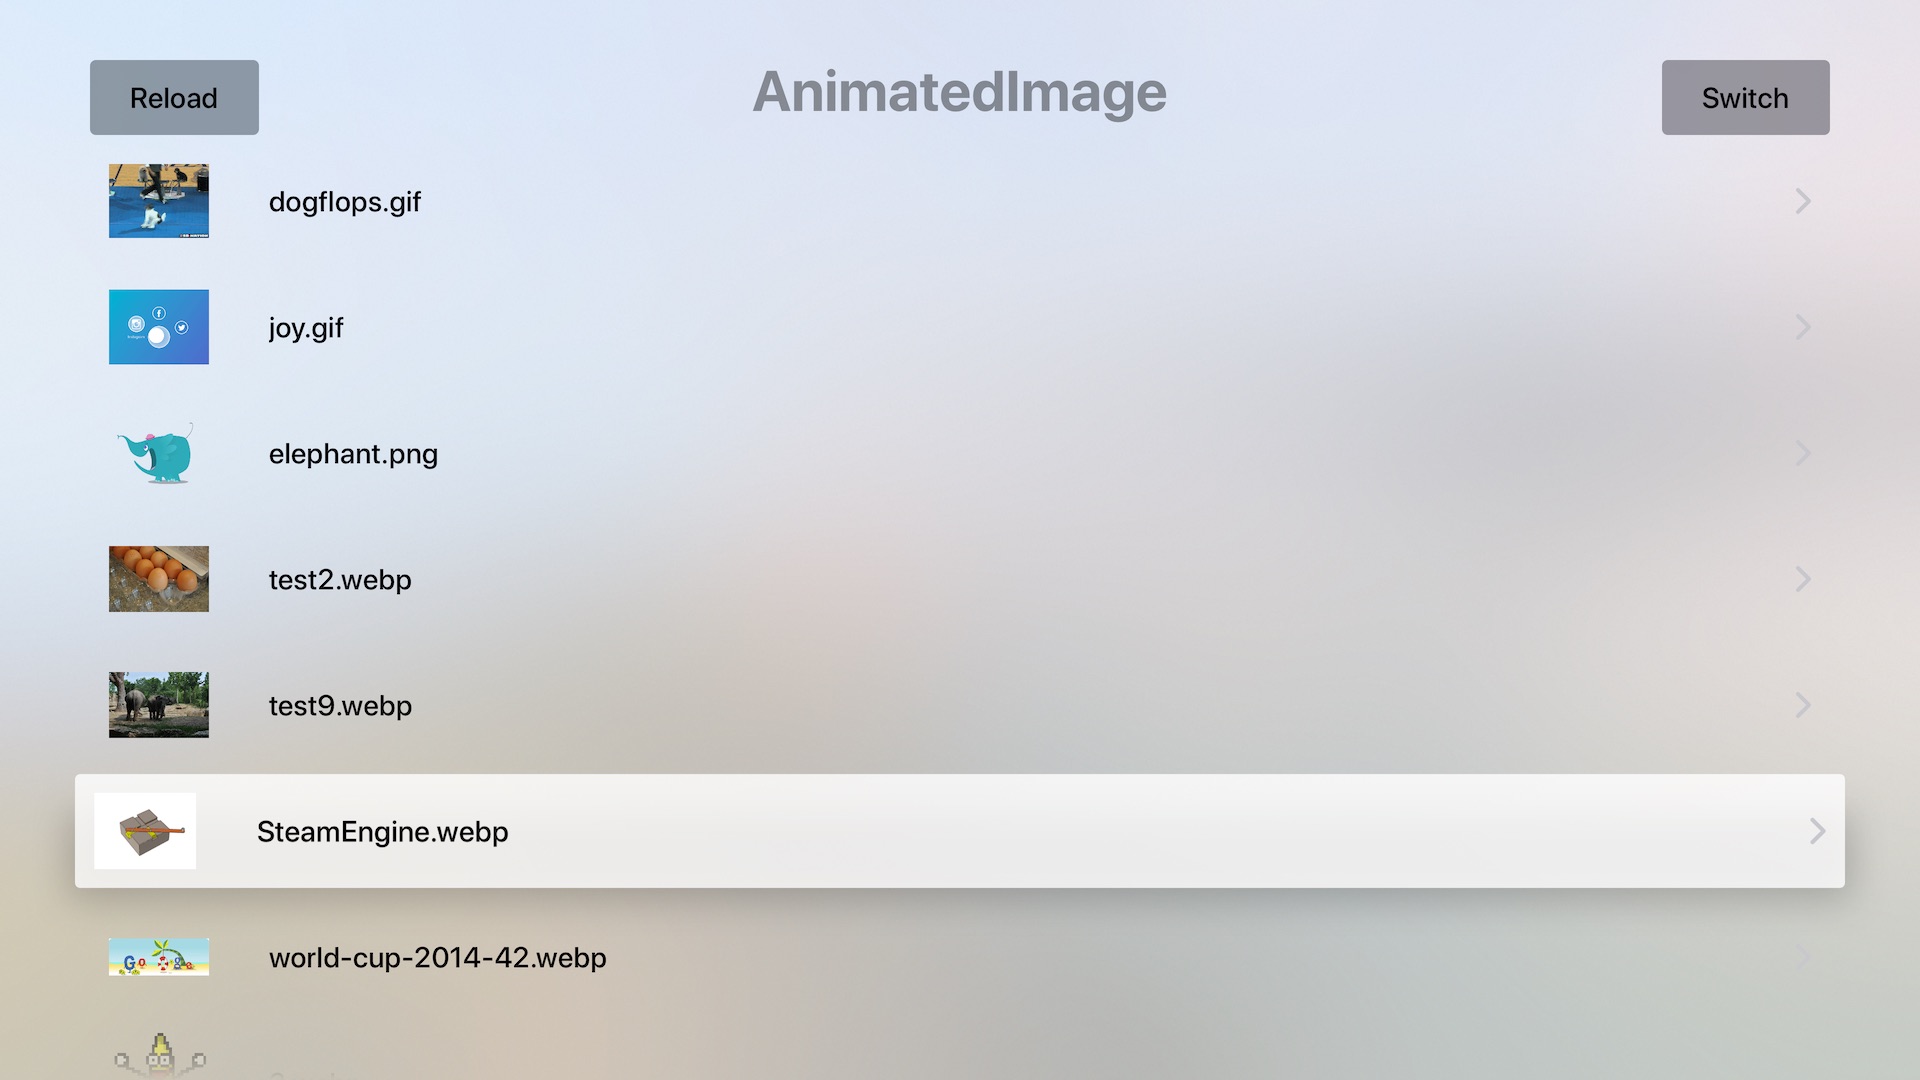
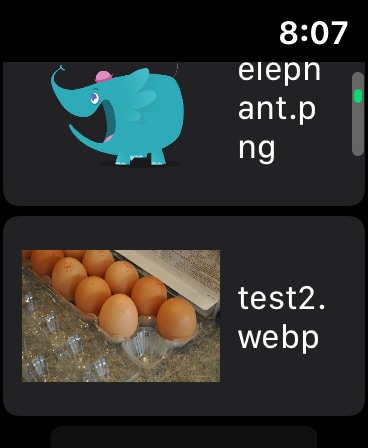
演示技巧
- 使用
Switch(在 macOS 上右键单击/在 watchOS 上点击)在WebImage和AnimatedImage之间切换。 - 使用
Reload(在 macOS 上右键单击/在 watchOS 上按钮)清除缓存。 - 使用
Swipe Left(tvOS 上的菜单按钮)从列表中删除一个图像 url。 - 捏合手势(watchOS 上的数字表冠,tvOS 上的播放按钮)放大详细页面图像。
- 清除缓存并转到详细页面以查看渐进式加载。
SDWebImageSwiftUI 具有单元测试以提高代码质量。对于 SwiftUI,Apple 没有提供官方的单元测试解决方案。
但是,由于 SwiftUI 是基于状态和属性实现的布局系统,因此有一些开源项目提供了解决方案
- ViewInspector:检查 View 的运行时属性值(如
.frame修饰符,.image值)。我们使用它来测试AnimatedImage和WebImage。它还允许检查原生 UIView/NSView。
要运行测试
- 在根目录上运行
pod install以安装依赖项。 - 打开
SDWebImageSwiftUI.xcworkspace,等待 SwiftPM 完成下载测试依赖项。 - 选择
SDWebImageSwiftUITests方案并开始测试。
我们已经设置了 CI 管道,每个 PR 都将运行测试用例并将测试报告上传到 codecov。
- iOS 演示
- macOS 演示
- tvOS 演示
- watchOS 演示
除了以上所有内容外,本项目还可以确保以下功能在 Swift 平台上 для SDWebImage 本身可用。
- SwiftUI 兼容性
- Swift Package Manager 集成
- Swift 源代码兼容性和 Swifty
这意味着,本项目是一个核心用例和下游依赖项,它驱动了 SDWebImage 本身的未来发展。
- SDWebImage
- libwebp
- libavif
- Kingfisher
- SwiftUIX
- Espera
- SwiftUI-Introspect
- ViewInspector
- SwiftUIBackports
SDWebImageSwiftUI 在 MIT 许可证下可用。有关更多信息,请参阅 LICENSE 文件。