NerdzUtils 是一个 Swift 框架,旨在通过提供一系列实用工具类和扩展来简化和增强常见的开发任务。该框架分为三个主要文件夹:
-
Extensions:此文件夹扩展了 Swift 的Foundation和UIKit框架的功能。- Foundation:包含 Foundation 框架的扩展,为 Swift 的核心类型添加了实用方法和功能。
- UIKit:包含 UIKit 框架的扩展,为 UI 组件和视图提供了额外的功能。
-
UI Components:此文件夹包含自定义 UI 组件,可以轻松集成到您的 iOS 项目中。这些组件旨在通过诸如可加载按钮、可加载图像视图等功能来增强用户界面。 -
Utils:Utils 文件夹包含各种实用工具类,这些类充当常见编程模式的构建块。其中包含的一些类有 SyncPropertyActor、DelayedAction、AtomicAsyncOperation 等。
Array+Safe 扩展为 Array 类型添加了一个下标 (safe),允许通过索引安全地访问元素。它通过在请求的索引超出数组边界时返回 nil 来帮助防止索引越界错误。
// Create an array
let myArray = [1, 2, 3, 4, 5]

// Access elements safely using the 'safe' subscript
if let element = myArray[safe: 2] {
    print("Element at index 2: \(element)")
}
else {
    print("Index 2 is out of range.")
}

// Try accessing an element at an out-of-range index
if let element = myArray[safe: 10] {
    print("Element at index 10: \(element)")
}
else {
    print("Index 10 is out of range.")
}
Bundle+CurrentAppVersion 扩展为 Bundle 类型添加了一个计算属性 appVersion。此属性提供了一种便捷的方式来从应用程序的 Info.plist 文件中检索当前应用程序版本。
let currentVersion = Bundle.main.appVersion
CGSize 的此扩展为处理具有特定宽高比的尺寸提供了便捷的实用工具。
- w16_h9:提供具有 16:9 宽高比的最小尺寸。
- w9_h16:提供具有 9:16 宽高比的最小尺寸。
- w4_h3:提供具有 4:3 宽高比的最小尺寸。
- w3_h4:提供具有 3:4 宽高比的最小尺寸。
- scaled(by:):按给定因子缩放尺寸。
// Access aspect ratio sizes
let size16x9 = CGSize.w16_h9
let sizeScaled = CGSize(width: 10, height: 5).scaled(by: 2.0)

// ... (use other aspect ratios and methods as needed)
DateDecodingStrategy+CustomISO8601 扩展为解析带有小数秒的 ISO 8601 日期提供了自定义的 DateDecodingStrategy。
- customISO8601:用于带有小数秒的 ISO 8601 日期的自定义日期解码策略。
要使用 DateDecodingStrategy+CustomISO8601 扩展,请按照以下步骤操作
在配置 JSONDecoder 实例以处理带有小数秒的 ISO 8601 日期时,使用 customISO8601 策略。
// Create a JSONDecoder with the custom date decoding strategy
let decoder = JSONDecoder()
decoder.dateDecodingStrategy = .customISO8601

// Use the decoder to decode JSON containing ISO 8601 dates with fractional seconds
let jsonData = """
{"date": "2024-02-05T12:34:56.789Z"}
""".data(using: .utf8)!

let decodedObject = try decoder.decode(MyObject.self, from: jsonData)
DispatchQueue+Once 扩展提供了一种机制,以确保代码块仅执行一次,无论调用多少次。
- once(per:token:action:):对于与对象关联的每个提供的令牌,执行一次代码块。
- once(for:action:):对于每个提供的令牌,执行一次代码块。
-
每个令牌执行一次代码:
使用
once(per:token:action:)方法可确保代码块对于与对象关联的每个提供的令牌仅执行一次。private func requestDefaultPermissions() async { DispatchQueue.nz.once(per: self, token: permissionsToken) { [weak self] in self?.permissionsManager.requestFirstLaunchStartupPermissions() } }
-
直接每个令牌执行一次代码
或者,使用
once(for:action:)方法直接对于每个提供的令牌执行一次代码块。DispatchQueue.nz.once(for: "uniqueToken") { // Code to be executed once }
Encodable+JsonData 扩展简化了将符合 Encodable 协议的对象转换为 JSON 数据的过程。
- nz_jsonData:返回给定对象的 JSON 数据。
struct MyStruct: Encodable {
    let id: Int
    let title: String
}

let myObject = MyStruct(id: 1, title: "Sample Title")

// Get JSON data from the encodable object
if let jsonData = myObject.nz_jsonData {
    // Use jsonData as needed
    print("JSON Data: \(String(data: jsonData, encoding: .utf8) ?? "Unable to convert to string")")
}
Formatter+iso8601 扩展提供了带有和不带有小数秒的 ISO8601 日期格式化器。
- iso8601WithFS:带有小数秒的 ISO8601 日期格式化器。
- iso8601:不带有小数秒的 ISO8601 日期格式化器。
// Format a date with fractional seconds
let currentDateWithFS = Date()
let formattedWithFS = Formatter.iso8601WithFS.string(from: currentDateWithFS)

// Format a date without fractional seconds
let currentDate = Date()
let formattedWithoutFS = Formatter.iso8601.string(from: currentDate)
NZUtilsExtensionData 和 NZUtilsExtensionCompatible 为创建具有流畅语法的 Swift 扩展奠定了基础,允许您向现有类型添加实用方法。
- NZUtilsExtensionData:用于扩展功能的包装类。
- NZUtilsExtensionCompatible:使类型与 NZUtils 扩展兼容的协议。
// Example: Creating an NZUtilsExtensionData wrapper
let myInteger = 42
let wrapper = NZUtilsExtensionData(myInteger)

// Access the base value
let baseValue = wrapper.base // This will be 42
// Example: Making a type compatible with NZUtils extensions
struct MyStruct:NZUtilsExtensionCompatible {
    var value: String
}

// Use NZUtilsExtensionData for MyStruct
let myInstance = MyStruct(value: "Hello")
let wrappedInstance = myInstance.nz

// Access the base value
let baseValue = wrappedInstance.base // This will be an instance of MyStruct
Locale+CountryList 扩展提供了便捷的方法来检索国家/地区列表并根据当前设备区域设置获取特定国家/地区的详细信息。
- countryList:返回基于当前设备区域设置的国家/地区列表。
- country(from:):根据国家/地区代码提供特定国家/地区的详细信息。
// Access country list
let countries [Country] = Locale.current.countryList

// Access details for a specific country (e.g., "US")
if let countryDetails = Locale.current.country(from: "US") {
    print("Country Code: \(countryDetails.code), Country Name: \(countryDetails.name)")
}
NSObject+ClassName 扩展提供了便捷的方法来检索 NSObject 实例的类名。
- className (static):返回 NSObject 类本身的类名。
- className (instance):返回 NSObject 当前实例的类名。
-
访问类名(静态):
// Access class name for MyClass
let className = MyClass.className
-
访问类名(实例):
// Create an instance of MyClass
let myClass = MyClass()

// Access class name for the instance
let instanceClassName = myClass.nz.className
String+Attributed 扩展提供了一种便捷的方法,可以使用指定的属性从 String 创建属性化字符串。
- attributed(with:):使用给定的属性形成属性化字符串。
let originalString = "Hello, World!"

let attributes: [NSAttributedString.Key: Any] = [
   .font: UIFont.boldSystemFont(ofSize: 16),
   .foregroundColor: UIColor.blue
]

let attributedString = originalString.nz.attributed(with: attributes)
String+IsWhiteSpaceOrEmpty 扩展提供了一种便捷的方法来检查字符串是否为空或仅由空格和换行符组成。
- isWhiteSpaceOrEmpty:如果字符串为空或仅由空格和换行符组成,则返回
true;否则,返回false。
let emptyString = ""
let whitespaceString = "     "
let nonEmptyString = "Hello, World!"

let isEmpty = emptyString.nz.isWhiteSpaceOrEmpty // true
let isWhitespace = whitespaceString.nz.isWhiteSpaceOrEmpty // true
let isNonEmpty = nonEmptyString.nz.isWhiteSpaceOrEmpty // false
String+Localization 扩展提供了一种便捷的方法来获取字符串的本地化表示形式,并支持覆盖当前区域设置。
- localized:返回当前字符串的本地化表示形式。
- overridenLocale (static):用于设置或检索本地化覆盖区域设置的属性。
-
获取本地化字符串:
使用
localized属性获取字符串的本地化表示形式。let originalString = "hello_key" let localizedString = originalString.nz.localized
在此示例中,localizedString 将包含键为
"hello_key"的字符串的本地化表示形式。 -
覆盖区域设置:
(可选)使用 overridenLocale 属性来设置或检索本地化的覆盖区域设置。
originalString.nz.overridenLocale = "fr" // Set to "fr" for French locale

// Access the localized string with the overridden locale
let frenchLocalizedString = originalString.nz.localized
注意:确保覆盖的区域设置是有效的区域设置标识符(例如,“fr”表示法语)。
String+VersionCompare 扩展提供了将字符串版本与目标版本进行比较的方法,从而可以在 Swift 项目中轻松进行版本比较。
- isVersion(equalTo:):如果字符串版本等于目标版本,则返回
true。 - isVersion(greaterThan:):如果字符串版本大于目标版本,则返回
true。 - isVersion(greaterThanOrEqualTo:):如果字符串版本大于或等于目标版本,则返回
true。 - isVersion(lessThan:):如果字符串版本小于目标版本,则返回
true。 - isVersion(lessThanOrEqualTo:):如果字符串版本小于或等于目标版本,则返回
true。
// Example: Comparing string versions
let currentVersion = "1.2.3"
let targetVersion = "1.2.0"

let isEqual = currentVersion.nz.isVersion(equalTo: targetVersion) // false
let isGreater = currentVersion.nz.isVersion(greaterThan: targetVersion) // true
let isGreaterOrEqual = currentVersion.nz.isVersion(greaterThanOrEqualTo: targetVersion) // true
let isLess = currentVersion.nz.isVersion(lessThan: targetVersion) // false
let isLessOrEqual = currentVersion.nz.isVersion(lessThanOrEqualTo: targetVersion) // false
UIApplication+OpenSettings 扩展提供了一种便捷的方法来打开 iOS 上应用程序的原生设置。
- openSettings:打开应用程序的原生设置。
let application = UIApplication.shared
application.openSettings()
UIApplication+Jailbreak 扩展提供了一种实用工具方法来检查当前设备是否可能已越狱。
- isJailbroken:验证当前设备是否可能已越狱。
let application = UIApplication.shared
let isJailbroken = application.nz.isJailbroken
UIColor+Hex 扩展提供了一个便捷的初始化器,可以使用十六进制颜色代码创建 UIColor 实例。
- init(hex: String, alpha: CGFloat):使用十六进制颜色代码和可选的 alpha 值创建
UIColor实例。
let hexColor = "#FF5733"
let alphaValue: CGFloat = 1.0

let color = UIColor(hex: hexColor, alpha: alphaValue)
UIAlertController+Extensions 提供了便捷的扩展,以简化 Swift 中 UIAlertController 实例的创建和呈现。
- action(title:handler:):向警报添加默认操作。
- destructive(title:handler:):向警报添加破坏性操作。
- cancel(title:handler:):向警报添加取消操作。
- source(_:):为平板电脑设置控制器源视图。
- show(on:):在给定的控制器上呈现警报。
// Example: Creating and presenting an alert
let alertController = UIAlertController(title: "Title", message: "Message", preferredStyle: .alert)

alertController.nz
   .action(title: "Default Action") {
       // Handle default action
   }
   .destructive(title: "Destructive Action") {
       // Handle destructive action
   }
   .cancel(title: "Cancel Action") {
       // Handle cancel action
   }
   .source(sourceView)
   .show(on: presentingController)
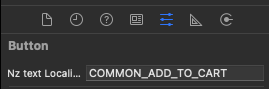
UIButton+Localized 扩展提供了一种便捷的方式来为 UIButton 实例设置本地化文本,尤其是在使用 nib 文件时非常有用。
- textLocalization:为按钮设置本地化文本。
- nz_textLocalization:一个
@IBInspectable属性,用于直接在 Interface Builder 中设置本地化文本。
-
以编程方式设置本地化文本:
let button = UIButton(type: .system)
button.nz.textLocalization = "buttonTitleKey"
-
在 Interface Builder 中设置本地化文本:
使用 @IBInspectable 属性 nz_textLocalization 直接在 Interface Builder 中设置本地化文本。

UIColor+Inversed 扩展提供了一种简单的方法来获取给定 UIColor 的反色。这对于在您的应用程序中创建视觉上对比鲜明的元素非常有用。
- inversed:计算并返回当前颜色的反色。
-
以编程方式计算反色:
let originalColor = UIColor.red
let inverseColor = originalColor.nz.inversed
-
在 UI 元素中应用反色:
let originalColor = UIColor.blue
let inverseColor = originalColor.nz.inversed

let myView = UIView()
myView.backgroundColor = originalColor // Set the original color
// ...
// Apply the inverse color to another UI element
someOtherElement.backgroundColor = inverseColor
UIControl+ClosureAction 扩展允许您轻松地向 UIControl 添加基于闭包的操作。这提供了一种更简洁和更具表现力的方式来处理控件事件。
- addAction(for:closure:):为特定的控件事件添加基于闭包的操作。
-
添加基于闭包的操作:
let myButton = UIButton()

myButton.nz.addAction(for: .touchUpInside) {
    print("Button tapped!")
}
-
使用闭包处理控件事件:
let mySwitch = UISwitch()

mySwitch.nz.addAction(for: .valueChanged) {
    print("Switch value changed!")
}
UIImage+BlurHash 扩展提供了一种使用 BlurHash 算法轻松初始化 UIImage 的方法。BlurHash 是图像占位符的紧凑表示形式,对于使用占位符效果延迟加载图像非常有用。
- 从 BlurHash 初始化:使用 BlurHash 算法初始化
UIImage,提供包括 BlurHash 字符串、渲染大小和 punch 的哈希信息。
let blurHashInfo = BlurHashInfo(
    hash: "LEHV6nWB2yk8pyo0adR*.7kCMdnj",
    size: CGSize(width: 320, height: 240)
)

if let blurredImage = UIImage(info: blurHashInfo) {
   // Use the blurredImage as a placeholder or background
}
UIImage+Scale 扩展提供了便捷的方法,可以根据宽度、高度或自定义大小要求缩放 UIImage 对象。
- 按宽度缩放:将图像缩放到特定宽度。
- 按高度缩放:将图像缩放到特定高度。
- 缩放到较大边:将图像缩放到较大边的指定大小。
- 缩放到较小边:将图像缩放到较小边的指定大小。
- 缩放到适应大小:缩放图像以适应目标大小,同时保持宽高比。
- 按因子缩放:按提供的因子缩放图像。
-
按宽度/高度缩放图像:
使用
scaled(toWidth:)/scaled(toHeight:)方法将图像缩放到特定宽度/高度。let originalImage: UIImage = // Some image let scaledByWidthImage = originalImage.nz.scaled(toWidth: 200) let scaledByHeightImage = originalImage.nz.scaled(toHeight: 150)
-
缩放到较大边/较小边图像:
使用
scaled(toBigger:)/scaled(toSmaller:)方法将图像缩放到较大边/较小边的指定大小。let originalImage: UIImage = // Some image let scaledToBiggerSideImage = originalImage.nz.scaled(toBigger: 300) let scaledToSmallerSideImage = originalImage.nz.scaled(toSmaller: 120)
-
缩放到适应大小图像:
使用 scaled(toFit:) 方法缩放图像以适应目标大小,同时保持宽高比。
let originalImage: UIImage = // Some image
let targetSize = CGSize(width: 250, height: 200)
let scaledImage = originalImage.nz.scaled(toFit: targetSize)
-
按因子缩放图像:
使用 scaled(by:) 方法按提供的因子缩放图像。
let originalImage: UIImage = // Some image
let scaledImage = originalImage.nz.scaled(by: 1.5)
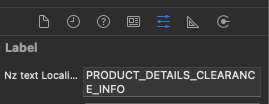
UILabel+NibLocalized 扩展提供了一种便捷的方式,可以直接从 .nib 文件为 UILabel 元素设置本地化文本。
- 本地化文本:轻松地从
.nib文件为UILabel设置本地化文本。
-
UILabel 的本地化文本:
let localizedLabel: UILabel = // Your UILabel from the Nib file
localizedLabel.nz.textLocalization = "localized_key"
-
Nib 文件中的本地化文本:
在您的 nib 文件中,您可以直接从 Xcode 的属性检查器中设置本地化文本。将 nz_textLocalization 属性设置为本地化键。UILabel 的文本将自动设置为与指定键对应的本地化字符串。

UINavigationBar+Translucent 扩展提供了一种便捷的方式来控制 UINavigationBar 的半透明度。
- 半透明状态:轻松设置或取消设置 UINavigationBar 的半透明度。
let navigationBar: UINavigationBar = // Your UINavigationBar instance
navigationBar.nz.makeTranslucent(true)
navigationBar.nz.makeTranslucent(false)
NerdzUtils 框架中的 UINavigationController+Completion 扩展通过为各种导航操作提供完成闭包来增强 UINavigationController。
- 推送带有完成处理程序的视图控制器:在将视图控制器推送到导航堆栈后执行闭包。
- 弹出到带有完成处理程序的视图控制器:在弹出到特定视图控制器后执行闭包。
- 弹出带有完成处理程序的视图控制器:在弹出顶部视图控制器后执行闭包。
- 弹出到带有完成处理程序的根视图控制器:在弹出到根视图控制器后执行闭包。
-
推送带有完成处理程序的视图控制器:
let navigationController: UINavigationController = // Your UINavigationController instance
let viewController: UIViewController = // The view controller to push

navigationController.nz.pushViewController(viewController, animated: true) {
    print("ViewController pushed!")
}
-
弹出到带有完成处理程序的视图控制器:
let navigationController: UINavigationController = // Your UINavigationController instance
let viewController: UIViewController = // The view controller to pop to

navigationController.nz.popToViewController(viewController, animated: true) {
    print("Popped to ViewController!")
}
-
弹出带有完成处理程序的视图控制器:
let navigationController: UINavigationController = // Your UINavigationController instance

navigationController.nz.popViewController(animated: true) {
    print("Popped top ViewController!")
}
-
弹出到带有完成处理程序的根视图控制器:
let navigationController: UINavigationController = // Your UINavigationController instance

navigationController.nz.popToRootViewController(animated: true) {
    print("Popped to Root ViewController!")
}
UITextField+Localized 扩展通过提供直接从 Interface Builder 或以编程方式设置本地化文本和占位符的功能来增强 UITextField。
- 本地化文本:从 nib 文件设置 UITextField 的本地化文本。
- 本地化占位符:从 nib 文件设置 UITextField 的本地化占位符。
-
本地化文本:
直接从 Interface Builder 或以编程方式设置本地化文本。
-
从 Interface Builder:
在 UITextField 的属性检查器中设置
nz_textLocalization属性。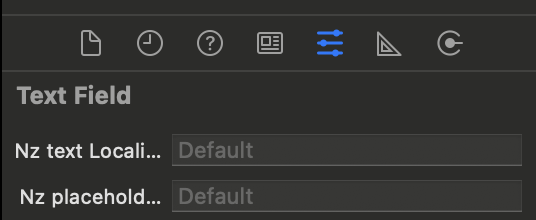
-
以编程方式:
let textField: UITextField = // Your UITextField instance
textField.nz_textLocalization = "localized_key"
-
-
本地化占位符:
直接从 Interface Builder 或以编程方式设置本地化占位符。
-
从 Interface Builder:
在 UITextField 的属性检查器中设置
nz_placeholderLocalization属性。 -
以编程方式:
let textField: UITextField = // Your UITextField instance
textField.nz_placeholderLocalization = "localized_placeholder_key"
-

UITextField+PasswordVisibility 扩展通过提供密码可见性切换来增强 UITextField。
- 密码可见性切换:为密码字段启用或禁用可见性切换。
| 名称 | 类型 | 可访问性 | 描述 |
|---|---|---|---|
nz_isPasswordVisibilityToggleEnabled |
Bool |
read-write IBInspectable |
直接从 Interface Builder 或以编程方式启用或禁用密码可见性切换。 |
在 UITextField 的属性检查器中设置 nz_isPasswordVisibilityToggleEnabled 属性。

let passwordTextField: UITextField = // Your UITextField instance
passwordTextField.nz_isPasswordVisibilityToggleEnabled = true
UIView+AddDashedBorder 通过提供一种便捷的方法来向视图添加虚线边框,从而扩展了 UIView 类。
- 虚线边框添加:添加具有可自定义属性(例如描边颜色、填充颜色、位置、线宽、线连接、虚线模式和圆角半径)的虚线边框。
func addDashedBorder(...) -> CAShapeLayer
| 名称 | 类型 | 默认值 | 描述 |
|---|---|---|---|
strokeColor |
UIColor |
- | 虚线边框的颜色。 |
fillColor |
UIColor |
UIColor.clear |
虚线边框内部的颜色。 |
position |
CGPoint |
.zero |
虚线边框的位置。 |
lineWidth |
CGFloat |
2 |
虚线边框线的宽度。 |
lineJoin |
CAShapeLayerLineJoin |
.round |
虚线边框的线连接样式。 |
lineDashPattern |
[NSNumber] |
[6, 3] |
虚线边框的虚线模式。 |
cornerRadius |
CGFloat |
20 |
圆角半径 |
let myView: UIView = // Your UIView instance
let dashedBorderLayer = myView.nz.addDashedBorder(
    with: .blue,
    fillColor: .clear,
    position: CGPoint(x: 10, y: 10),
    lineWidth: 2,
    lineJoin: .round,
    lineDashPattern: [6, 3],
    cornerRadius: 20
)
UIView+ApplyGradient 扩展通过提供一种轻松向视图应用渐变的方法来增强 UIView 类。
- applyGradient(colors:locations:type:startPoint:endPoint:):使用可自定义的属性向视图添加渐变。
| 名称 | 类型 | 默认值 | 描述 |
|---|---|---|---|
colors |
[UIColor] |
- | 一个 UIColor 对象数组,用于定义每个渐变停止点的颜色。 |
locations |
[NSNumber] |
- | 一个 NSNumber 对象数组,用于定义每个渐变停止点的位置,值范围为 [0,1]。 |
type |
CAGradientLayerType |
.axial |
渐变的类型。 |
startPoint |
CGPoint |
{0.5, 0} |
渐变的起始点。 |
endPoint |
CGPoint |
{0.5, 1} |
渐变的结束点。 |
let myView: UIView = // Your UIView instance
let gradientLayer = myView.nz.applyGradient(
    colors: [.red, .blue],
    locations: [0, 1],
    type: .axial,
    startPoint: CGPoint(x: 0.5, y: 0),
    endPoint: CGPoint(x: 0.5, y: 1)
)
UIView+ApplyShadow 扩展通过提供一种轻松向视图应用阴影的方法来增强 UIView 类。
- applyShadow(color:opacity:offSet:radius:):轻松应用具有可自定义属性的阴影。
| 名称 | 类型 | 默认值 | 描述 |
|---|---|---|---|
color |
UIColor |
- | 阴影的颜色。 |
opacity |
Float |
0.5 |
阴影的不透明度。 |
offSet |
CGSize |
.zero |
阴影的偏移量。 |
radius |
CGFloat |
1 |
阴影的半径。 |
let myView: UIView = // Your UIView instance
myView.nz.applyShadow(
    color: .black,
    opacity: 0.7,
    offSet: CGSize(width: 2, height: 2),
    radius: 3
)
UIView+AsImage 扩展通过提供一种捕获视图屏幕截图的方法来扩展 UIView 类。
- asImage():捕获视图的屏幕截图。
let myView: UIView = // Your UIView instance
let screenshotImage = myView.nz.asImage()
UIView+InspectableLayer 扩展为配置 UIView 的图层提供了可检查的属性。
- 可检查的属性:在 Interface Builder 中轻松配置视图属性,而无需代码。
| 属性 | 类型 | 描述 |
|---|---|---|
cornerRadius |
CGFloat |
视图圆角半径 |
maskedCorners |
CACornerMask |
视图蒙版角(从 iOS 11.0 开始可用) |
borderWidth |
CGFloat |
视图边框宽度 |
borderColor |
UIColor? |
视图边框颜色 |
shadowColor |
UIColor? |
视图阴影颜色 |
shadowAlpha |
Float |
视图阴影不透明度 |
shadowOffset |
CGSize |
视图阴影偏移 |
shadowBlur |
CGFloat |
视图阴影半径 |
-
从 Interface Builder:
在 UIView 的属性检查器中设置可检查的属性。
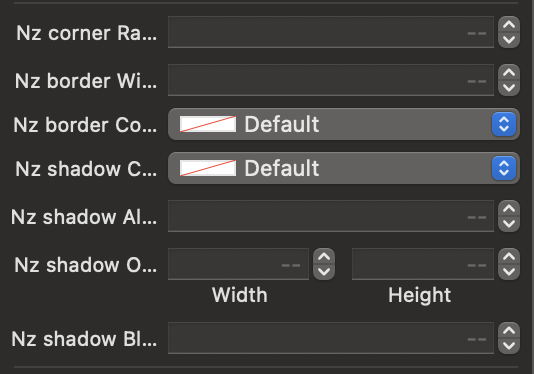
-
以编程方式:
let myView: UIView = // Your UIView instance

// Configure properties programmatically
myView.cornerRadius = 10.0
myView.maskedCorners = [.layerMinXMinYCorner, .layerMaxXMaxYCorner]
myView.borderWidth = 1.0
myView.borderColor = UIColor.black
myView.shadowColor = UIColor.gray
myView.shadowAlpha = 0.5
myView.shadowOffset = CGSize(width: 2.0, height: 2.0)
myView.shadowBlur = 5.0

UIView+RoundCorners 扩展提供了一种方法,可将圆角应用于 UIView 的特定角,并可以选择添加边框。
-
roundCorners(_:radius:borderColor:borderWidth:):将圆角应用于视图的指定角。
名称 类型 默认值 描述 cornersCACornerMask- 应用半径的角。 radiusCGFloat- 圆角半径。 borderColorUIColor.clear边框的颜色。 borderWidthCGFloat0边框的宽度。
let myView: UIView = // Your UIView instance

// Apply round corners to the top-left and top-right corners with a radius of 10
// Also, add a border with a color of red and a width of 2
myView.nz.roundCorners(
    [.layerMinXMinYCorner, .layerMaxXMinYCorner],
    radius: 10,
    borderColor: .red,
    borderWidth: 2
)
UIViewController+AddChild 扩展提供了一种方法,可以轻松添加具有所有必要配置的子视图控制器。
-
easilyAddChild(_:on:configurationAction:):将子视图控制器添加到指定的容器,并带有可选配置。
参数 类型 默认值 描述 childControllerUIViewController- 要添加为子视图控制器的视图控制器。 containerUIView?nil子视图控制器将添加到的容器视图。如果未提供,则将使用基本视图控制器的 view。configurationAction((UIView, UIView) -> Void)UIViewController.nz.setupFullscreen用于设置约束的配置操作。如果未提供,则将变为容器的完整大小。
let parentViewController: UIViewController = // Your parent view controller
let childViewController: UIViewController = // Your child view controller

// Add child view controller to the parent view controller's view with default configuration
parentViewController.nz.easilyAddChild(childViewController)

// Add child view controller to a custom container view with custom configuration
let customContainerView: UIView = // Your custom container view
parentViewController.nz.easilyAddChild(childViewController, on: customContainerView) { childView, parentView in
    // Your custom configuration code for constraints
}
UIViewController+Overlay 扩展提供了将当前视图控制器作为覆盖层呈现和解除的方法。
-
presentAsOverlay():将当前视图控制器作为覆盖层呈现。
-
dismissOverlay() throws:如果当前视图控制器是作为覆盖层呈现的,则解除它。
抛出
OverlayPresentationError.noWindow:如果视图没有可用的窗口。OverlayPresentationError.notOverlay:如果视图控制器不是作为覆盖层呈现的。
let viewController: UIViewController = // Your view controller

// Present the view controller as an overlay
viewController.nz.presentAsOverlay()

// Dismiss the overlay if it was presented
do {
    try viewController.nz.dismissOverlay()
}
catch {
    print(error.localizedDescription)
}
UIViewController+Top 扩展提供了一个属性,用于获取顶部呈现或推送的视图控制器。
- topController:顶部呈现或推送的视图控制器。
let viewController: UIViewController = // Your view controller
let topController = viewController.nz.topController
LoadableButton 是一个扩展 UIButton 的类,提供带有活动指示器的加载功能。
| 名称 | 类型 | 默认值 | 描述 |
|---|---|---|---|
onStartLoading |
LoadableButtonEmptyAction |
- | 加载开始时要执行的闭包。 |
onFinishLoading |
LoadableButtonEmptyAction |
- | 加载完成时要执行的闭包。 |
topBottomIndicatorPadding |
CGFloat |
10 |
活动指示器与按钮顶部和底部的间距。 |
isLoading |
Bool |
false |
一个布尔值,指示按钮是否处于加载状态。 |
activityIndicatorView |
UIView |
- | 表示加载指示器的视图。 |
-
设置加载状态:
let loadableButton: LoadableButton = // Your LoadableButton instance

// Set the loading state
loadableButton.isLoading = true
-
自定义加载按钮:
let loadableButton: LoadableButton = // Your LoadableButton instance

// Customize the loading button
loadableButton.topBottomIndicatorPadding = 15
loadableButton.activityIndicatorView = customActivityIndicatorView
-
处理加载事件:
let loadableButton: LoadableButton = // Your LoadableButton instance

loadableButton.onStartLoading = {
    // Code to execute when loading starts
}

loadableButton.onFinishLoading = {
    // Code to execute when loading finishes
}
表示 LoadableImageView 类存储加载图像的方式
有关更多信息,请参阅
LoadableImageView的文档
.none
无需存储
.cache(timeout: TimeInterval? = nil)
加载的图像需要缓存
如果未提供超时时间,则图像将在目标存在期间被缓存。
| 名称 | 类型 | 默认值 | 描述 |
|---|---|---|---|
timeout |
TimeInterval? |
nil |
缓存图像需要重新加载的持续时间 |
-
startSpinnerLoading(with color: UIColor? = nil, size: CGFloat? = nil)参数 类型 默认值 描述 colorUIColor?nil加载器旋转器的颜色。 sizeCGFloat?nil加载器旋转器的大小。 开始使用旋转器加载。
-
stopSpinnerLoading()停止加载。
-
开始使用旋转器加载:
yourView.startSpinnerLoading(with: .white, size: 15.0)
-
停止加载:
yourView.stopSpinnerLoading()
一个属性包装器,简化了属性与 UserDefaults 的同步,提供自动初始化和值检索。
-
init(_ key:, initial:, defaults:):参数 类型 默认值 描述 keyString- 用于在 UserDefaults 中存储值的键。 initial类型- UserDefaults 为空时的初始值。 defaultsUserDefaults.standardUserDefaults 实例。
wrappedValue:获取或设置属性包装器的值。
-
基本用法:
@DefaultsProperty("userLoggedIn", initial: false)
var isUserLoggedIn: Bool
-
自定义 UserDefaults:
let customUserDefaults = UserDefaults(suiteName: "com.example.app")

@DefaultsProperty("darkModeEnabled", initial: false, defaults: customUserDefaults)
var isDarkModeEnabled: Bool
一个属性包装器,方便属性与 Keychain 的自动同步,提供无缝的初始化和值检索。
-
init(_ key:, initial:, keychain:))参数 类型 默认值 描述 keyString- 用于在 Keychain 中存储值的键。 initial类型- Keychain 为空时的初始值。 keychainKeychainKeychain(service: Bundle.main.bundleIdentifier ?? "")Keychain 实例。
wrappedValue:获取或设置属性包装器的值。
-
基本用法:
@KeychainProperty("userAuthToken", initial: "")
var userAuthToken: String
-
自定义 UserDefaults:
let customKeychain = Keychain(service: "com.example.app.keychain")

@KeychainProperty("userPassword", initial: "", keychain: customKeychain)
var userPassword: String
AtomicAsyncOperation 类封装了每次执行单个操作的逻辑,确保操作不会被多个请求并发启动。如果操作已经在进行中,则会将其他请求添加到完成列表,并在初始操作完成后调用其闭包。这种方法最大限度地减少了冗余执行,并为服务延迟初始化或优化请求执行等场景提供了解决方案。
注意:此类在内部使用后台队列,因此请确保所有 UI 操作都包装在主队列中。
-
init(action:)参数 类型 默认值 描述 actionAction完成- 需要执行的执行操作。
action:执行操作闭包。isRunning:一个布尔值,指示操作当前是否正在进行中。
-
perform(completion:):如果操作尚未运行,则执行操作;如果操作已在运行,则将其添加到完成列表。参数 类型 默认值 描述 completionCompletion?nil 执行完成时要调用的完成闭包。
let asyncOperation = AtomicAsyncOperation { completion in
    // Perform your asynchronous operation logic here
    // For example, fetching data from a network API
    fetchDataFromAPI { result in
        // Process the result
        // ...

        // Notify completion when finished
        completion()
    }
}

// Trigger the asynchronous operation
asyncOperation.perform {
    // Closure to be executed when the operation completes
    // This can be used to update the UI or perform additional tasks
}
DelayedAction 类提供了一种延迟执行闭包的机制,并允许在需要时取消或重新安排。
-
cancel() -> Bool:取消任何待处理的操作执行。
返回类型 描述 Bool如果取消成功,则返回 true,否则返回false。 -
perform(after:, queue:, action:):计划在指定延迟后执行操作。
参数 类型 默认值 描述 delayTimeInterval- 操作需要执行的延迟时间。 queueDispatchQueue.main将在其上执行操作的队列。 action() -> Void- 需要执行的操作。
-
延迟执行:
let delayedAction = DelayedAction()

// Schedule an action to be executed after a delay
delayedAction.perform(after: 2.0) {
    print("Delayed action executed!")
}

// Cancelling the pending execution (if needed)
delayedAction.cancel()
-
重新安排操作:
let delayedAction = DelayedAction()

delayedAction.perform(after: 3.0) {
    print("Initial action executed!")
}

// Rescheduling the action to be executed sooner
delayedAction.perform(after: 1.0) {
    print("Rescheduled action executed!")
}
IdType 协议定义了表示唯一标识符的类型的要求。当您有各种类型的实体(例如,用户、产品等)需要标准化的方式来表示其身份时,通常会使用它。它确保唯一性并方便诸如相等比较 (==) 和哈希之类的操作。
-
IdType: Hashable:该协议要求符合
Hashable协议,允许实例在基于哈希的集合中使用。 -
var id: ID { get }:类型为
ID的属性id,表示实例的唯一标识符。关联类型ID表示标识符,也符合Hashable。这允许标识符类型的灵活性,例如String或Int。
-
StringIdType: IdType:IdType的子协议,其中关联的标识符类型为String。 -
IntIdType: IdType:IdType的子协议,其中关联的标识符类型为Int。
-
hash(into hasher:, inout Hasher):一个扩展方法,为哈希处理提供默认实现,组合标识符的哈希值。
参数 类型 描述 hasherinout Hasher在组合哈希值时要使用的哈希器。
-
==运算符重载:相等运算符 (
==) 的重载,用于符合IdType的实例,比较其标识符的相等性。
// Example conforming type
struct UserID: IntIdType {
    let id: Int
}

// Example usage
let user1 = UserID(id: 42)
let user2 = UserID(id: 42)

// Equality comparison
let areEqual = (user1 == user2) // true

// Hashing
var hasher = Hasher()
user1.hash(into: &hasher)
let hashValue1 = hasher.finalize()

print("Hash Value for User 1: \(hashValue1)")
SyncPropertyActor 是一个基于 Actor 的容器,旨在为给定类型的属性提供线程安全的访问。
-
init(_ value: T):使用指定的初始值初始化 SyncPropertyActor 的新实例。参数 类型 描述 valueT要存储在属性中的初始值。
-
setNewValue(_ value: T):为属性设置新值,确保线程安全参数 类型 描述 valueT要设置的新值。 -
modify(with closure: (inout T) -> Void):使用闭包修改属性的值,确保线程安全。参数 类型 描述 closure(inout T) -> Void一个闭包,它可以接受一个代表属性值的 inout参数。使用此闭包来安全地修改值。
-
设置新值:
private let nextProductsPageLink = SyncPropertyActor<URL?>(nil)

Task {
    // Use the setNewValue method to set the property to a new URL.
    await nextProductsPageLink.setNewValue(URL(string: "https://example.com/nextpage"))
}
-
修改现有值:
// Example of modifying the property within a task
Task {
    nextProductsPageLink.modify { currentURL in
        // Modify the current URL, for example, appending a query parameter
        currentURL?.appendPathComponent("additionalPath")
    }
}
类型: class
添加在强包装器中拥有弱引用的可能性。在您需要在 Array 或 Dictionary 中使用对象的弱引用的情况下很有用。
class SomeClass {
    // All objects stored in this array will be stored with weak reference
    private let weekArray = Array<Weak<AnotherClass>>()
}
| 名称 | 类型 | 可访问性 | 描述 |
|---|---|---|---|
对象 |
T? |
读写 |
包装的对象 |
init(_ object: T?)
使用包装的对象来初始化包装器
| 名称 | 类型 | 默认值 | 描述 |
|---|---|---|---|
对象 |
T? |
包装的对象 |